This article explains how to preserve support for HEIC images in Synology Photos 7.2.2 by generating thumbnails for existing images.
I never thought I would need to write this article since Synology’s DSM had supported HEIC for several years without issues. However, with the release of DSM 7.2.2 at the end of 2024, things have taken a turn for the worse. Although HEIC is still officially supported, I’ve found that a significant portion of its functionality was lost. I couldn’t view most of my photos, and that speaks for itself.
To be fair, my experience may not reflect the general situation, but I’ve seen several posts online that indicate I’m not alone in facing these issues. And I run a completely standard setup on my NAS.
What happened?
Synology decided they would no longer install the HEVC codec on the NAS and perform transcoding on end devices:
“Starting from this version, the processing of media files using HEVC (H.265), AVC (H.264), and VC-1 codecs will be transitioned from the server to end devices to reduce unnecessary resource usage on the system and enhance system efficiency. These codecs are widespread on end devices such as smartphones, tablets, computers, and smart TVs. If the end device does not support the required codecs, the use of media files may be limited.” Release Notes for DSM | Synology Inc.
The root problem is financial: the HEVC codec isn’t free. I have no way of knowing how much Synology pays for it, but it appears to be an annual fee.
As a result, DSM can no longer generate previews of HEIC images on the NAS. Instead, Synology offers desktop and mobile apps to handle this task. The desktop app can be quite cumbersome to install. You need both the app and the browser extension, which is unsigned and requires some adjustments to get it working. Synology had to provide step by step installation instructions.
Synology, why is the browser extension unsigned? It just seems wrong, security-wise, and besides, ‘Allow unsigned extensions’ setting in Safari resets to ‘no’ every time you restart the browser, so you need to go through the settings again to make it work.
In my experience, this new setup worked well for new images uploaded through the Photos web interface. However, other methods of uploading did not yield the same results.
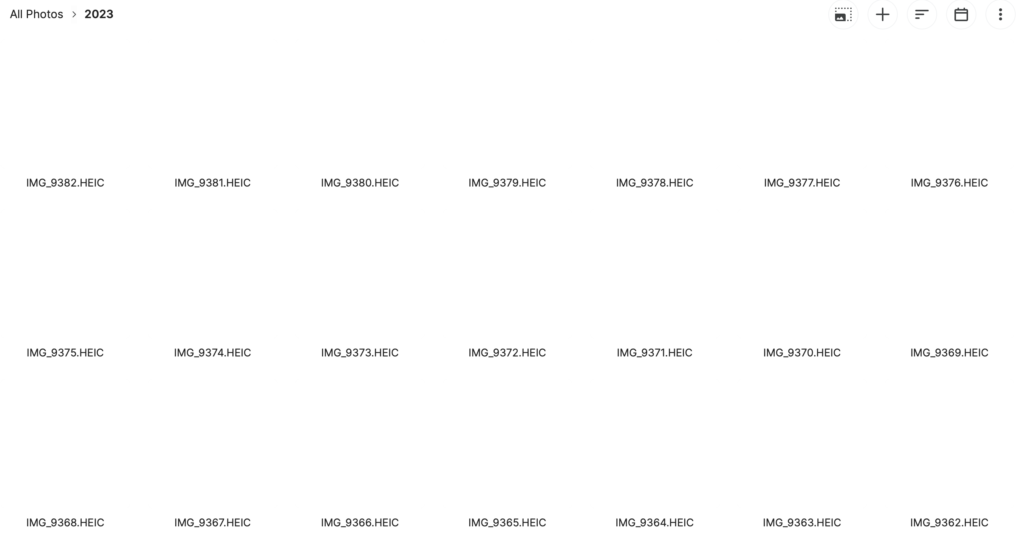
For existing HEIC images—of which I have many—only some random previews were generated. The remaining majority of images produced blank (white) previews. Reindexing and waiting did not resolve the issue. I’m not sure if this is a bug or if it’s simply overwhelmed by the size of my library. According to Synology’s website, “For HEIC photos and HEVC videos added through the web portal, File Station, or SMB, the latest Synology Photos mobile app can also generate additional JPEG previews.” Unfortunately, that wasn’t the case for me.
I found myself questioning whether my NAS could still serve as a central location for photo storage. While there is a way to make it work by re-downloading the entire library, I hesitated to pursue that option due to the risk of losing some files in the process. I need it to be reliable and future-proof.
How does Synology Photos work under the hood?
I won’t pretend to fully understand everything because I don’t. There is a database that contains image indexes and metadata. I don’t recommend tampering with that database; besides, in my experience, DSM has been able to index images correctly, so I don’t think that’s where the issue lies.
When you browse the Photos library on a mobile device or in a web browser, the NAS doesn’t display the actual photos. Instead, you see a JPEG preview that is much smaller than the original image, or an even smaller thumbnail.
In each folder of the Photos library, Synology creates a hidden subfolder called ‘@eaDir’. These ‘@eaDir’ folders are not visible in File Station or through SMB/AFP mounts; the only way to access them is by connecting to the NAS via SSH.
Inside each ‘@eaDir’ folder, there is a subfolder for every image that contains JPEG previews in three different sizes. For example, if the original image IMG_9887.HEIC was uploaded via the Photos web portal in the /2024 folder, this is what you would find.
In folder /2024:

-rwxrwxrwx+ 1 pavel users   1491650 Jan 31 21:15  IMG_9887.HEIC

In folder /2024/@eaDir:

drwxrwxrwx+ 1 root root 170 Feb  1 10:44  IMG_9887.HEIC
-rwxrwxrwx+ 1 root root   0 Jan 31 21:18  IMG_9887.HEIC@SynoEAStream

In folder /2024/@eaDir/IMG_9887.HEIC:

-rwxrwxrwx+ 1 root  root              444 Jan 31 21:15 SYNOINDEX_MEDIA_INFO
-rw-r--r--  1 pavel SynologyPhotos  39441 Jan 31 21:15 SYNOPHOTO_THUMB_M.jpg
-rw-r--r--  1 pavel SynologyPhotos  25587 Jan 31 21:15 SYNOPHOTO_THUMB_SM.jpg
-rw-r--r--  1 pavel SynologyPhotos 490489 Jan 31 21:15 SYNOPHOTO_THUMB_XL.jpg
The same previews can also be used by File Station, provided they are available. It seems that File Station can create a preview file named SYNOFILE_THUMB_M.jpg, but during my testing, I encountered the same viewing issues. I believe (though I may be mistaken) that IMG_9887.HEIC@SynoEAStream is not related to Photos; instead, it stores extended attributes like macOS Finder tags and custom metadata. The SYNOINDEX_MEDIA_INFO file is a text file that contains preview metadata, and it is created during the indexing process in Synology Photos.
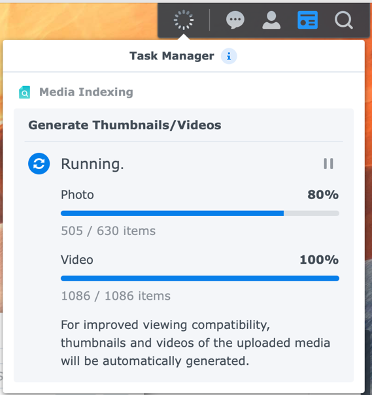
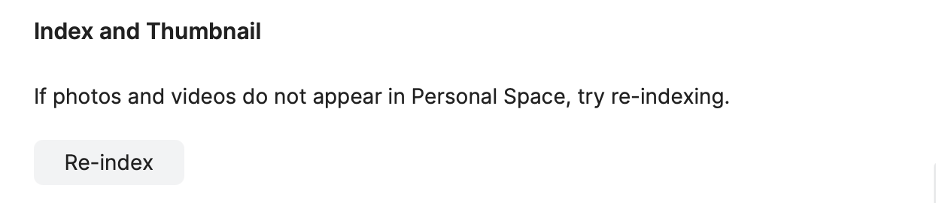
This setup is not new. Before the release of DSM 7.2.2, the NAS was able to generate previews for all types of images, including HEIC. Preview generation would be launched automatically following an upload (you would see this progress window) or you could manually trigger full reindexing in Photos’ settings.
After the DSM 7.2.2 update, it can still process formats like BMP, GIF, JPEG, and PNG, but requires Synology Image Assistant to handle HEIC/HEVC and some other formats. How does Synology Photos process and display my photos and videos? – Synology Knowledge Center
As I mentioned earlier, Synology Image Assistant did not function reliably for me.
Solution summary
My plan is to follow Synology’s suggestion to offload preview generation from the NAS to the Mac, but I’ll use command-line tools instead of relying on Synology Image Assistant. Here’s the approach I intend to take:
- Copy the photos library from the NAS to the Mac.
- Generate the previews on the Mac.
- Copy the previews back to the NAS.
Cautionary statement: you should have some level of understanding of the shell commands you will be executing. Things can go wrong even with a typo. You should back up your NAS before proceeding.
Adjust settings
Before you start, you’ll need to enable rsync and SSH services on the NAS. They should be disabled by default for security reasons unless you are using them regularly.
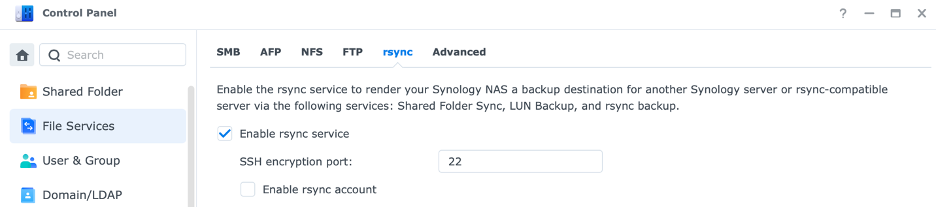
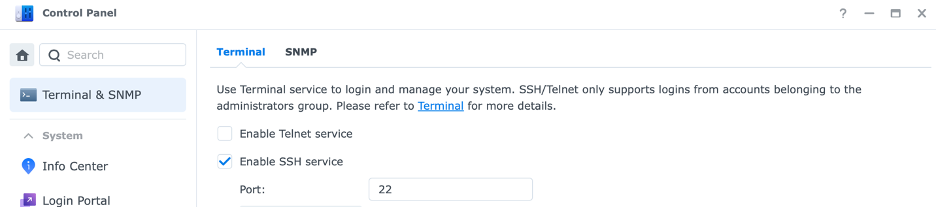
You may get a message inviting you to change firewall settings (forward port 22). Normally (but it depends on your network setup, I assume all ports are open for local connections) you don’t need to do that.
Once you have finished generating previews, I recommend that you disable rsync and SSH as they provide an entry point into the NAS.
Adjust permissions
Before we proceed, we need to talk about permissions on the NAS and how to troubleshoot them. You may encounter ‘Permission denied’ error messages due to a combination of the following situations:
- When you run rsync you are accessing the NAS with your admin account. Only admins are allowed to use rsync on a Synology NAS. Theoretically, you could run rsync as root on the remote side but gaining remote root access can be tricky and somewhat questionable in my opinion.
- Permissions granted to the image files themselves may differ depending on how they were copied on the NAS. Synology uses ACLs which may not be inherited.
- Permissions granted to @eaDirs and their contents also depend on how they were generated. Below is an example among others:
drwxr-xr-x 1 root root 70946 Feb 11 19:30 @eaDirFor images, use File Station (Actions -> Properties -> Permissions) to inherit permissions from the parent folder.
To change ownership and permissions of @eaDirs, you first need to SSH into the NAS:
iMac ~ % ssh admin@192.168.1.100You will be prompted for admin’s password for the NAS. Then, execute the following command on the NAS to change ownership and permissions ror all @eaDirs and their contents to allow the admin to read, write and traverse directories, i.e rwxr–r– or 744:
#! /bin/zsh

if [[ ! "${#}" == 1 ]] ; then
    echo "Usage: $0 <directory>"
    exit 1
fi

find "$1" -iname '*.heic' -type f | while read file; do
     file_path=$(realpath "$file")
     dir_path=$(dirname "$file_path")
     file_name=$(basename "$file_path")
     target_path="${dir_path}/@eaDir/${file_name}/"
     if [[ ! -d "$target_path" ]]; then
         mkdir -p "$target_path"
     fi

    sips -Z 320 -s format jpeg -s dpiWidth 72 -s dpiHeight 72 "$file" --out "${target_path}/SYNOPHOTO_THUMB_SM.jpg"
    sips -Z 427 -s format jpeg -s dpiWidth 72 -s dpiHeight 72 "$file" --out "${target_path}/SYNOPHOTO_THUMB_M.jpg"
    sips -Z 1707 -s format jpeg -s dpiWidth 72 -s dpiHeight 72 "$file" --out "${target_path}/SYNOPHOTO_THUMB_XL.jpg"

done
This script iterates over all .heic files (case-insensitive) in the directory specified as a parameter and creates a subdirectory ‘@eaDir/<image file name>’ for each of them. Each subdirectory is populated with three JPEG images of different sizes. The script recurses into any subdirectories.
You might need to grant execute permission to run the script:
iMac ~ % chmod +x MakeSynoPreview.shTo execute the script, provide the path to the folder you want to process as a parameter:
iMac ~ % MakeSynoPreview.sh /Volumes/Crucial_X8/Temp/Shared/2024Copy previews to the NAS
Now we need to copy the contents of the newly generated ‘@eaDir’ folders to the NAS.
Assuming you have set the proper permissions on the NAS, you can run rsync. Here I am transferring only the newly created previews located in @eaDirs. Again, try a dry run first.
iMac ~ % rsync -av -e ssh --include '*/' --include '@eaDir/***' --exclude='*' /Volumes/Crucial_X8/Temp/Shared/2024/ admin@192.168.1.100::photo/2024/Now you can check the results in Synology Photos. You may need to empty the cache and reload the page.
Cleaning up
I realized that under some circumstances (e.g. when a preview is not available) Synology would create files named .fail. Although this is optional, you may want to delete those files. Run the command below on the NAS, and I recommend to first run it without the -delete option to make sure it’s doing the right thing.
admin@SynologyNAS:sudo find /volume1/photo/2024 -type f -name "*.fail" -deleteConclusion
I’m quite pleased with how this worked out. Importantly, the solution is non-intrusive; I didn’t alter any essential settings on the NAS. Security is maintained, and no additional third-party software was installed, which minimizes the risk of causing any issues later on.
That said, I would have preferred native HEIC support from Synology so I could simply enjoy my photos with my family. Instead, I had to develop this workaround and hope it remains effective over time. The reality is that my options were somewhat limited. With a NAS, you find yourself reliant on the vendor’s software suite. There are some third-party alternatives to Photos, like PhotoPrism or Immich, but from what I understand, they aren’t exactly low maintenance either. Switching to a different brand, such as QNAP, is also not a decision to be made lightly. For now, I’m happy that I can continue using Photos as it is.
Let me know your thoughts, whether you have experienced any issues with DSM 7.2.2 and whether this post was of any help.
Visit Synology website